My Google Adsense Tax Information Details in the Philippines as Blogger and Youtube Partner Video Content Creator
Earlier this month - March 2021, Google Adsense started to ask its partner
publishers worldwide to submit or manage their new US Tax Information
details to ensure that applicable taxes on payments are accurate.
As a result, many of my blogger and vlogger friends here in the Philippines
have been messaging me and asking for advice on how to fill-up the form
properly since I'm one of the more veteran Google Adsense Partners in our
country.
I can't really say for sure if the way I answered my own Tax Info form is
the ideal way to do it but nonetheless, as per your request, I'd like to
share you how I did it.
>
Let's do this step by step.
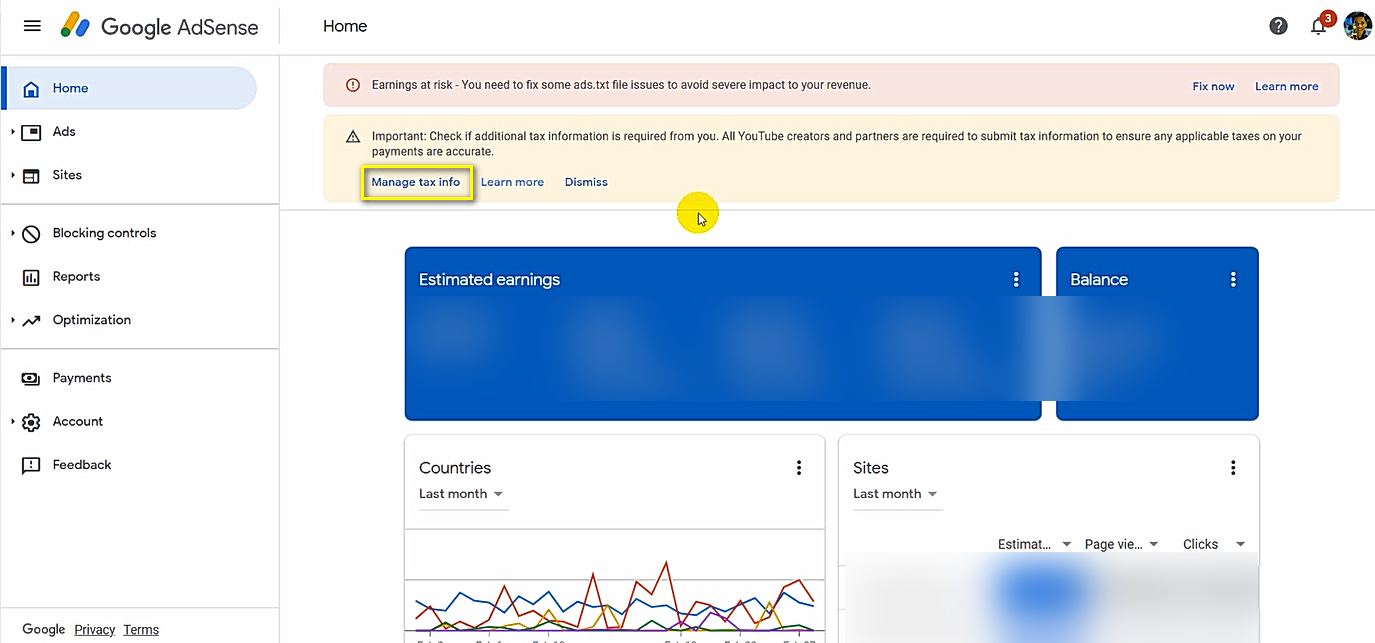
1. To create or manage your Tax Information form, simply click on "Manage tax
info" link on the notification on top of your Adsense home screen.
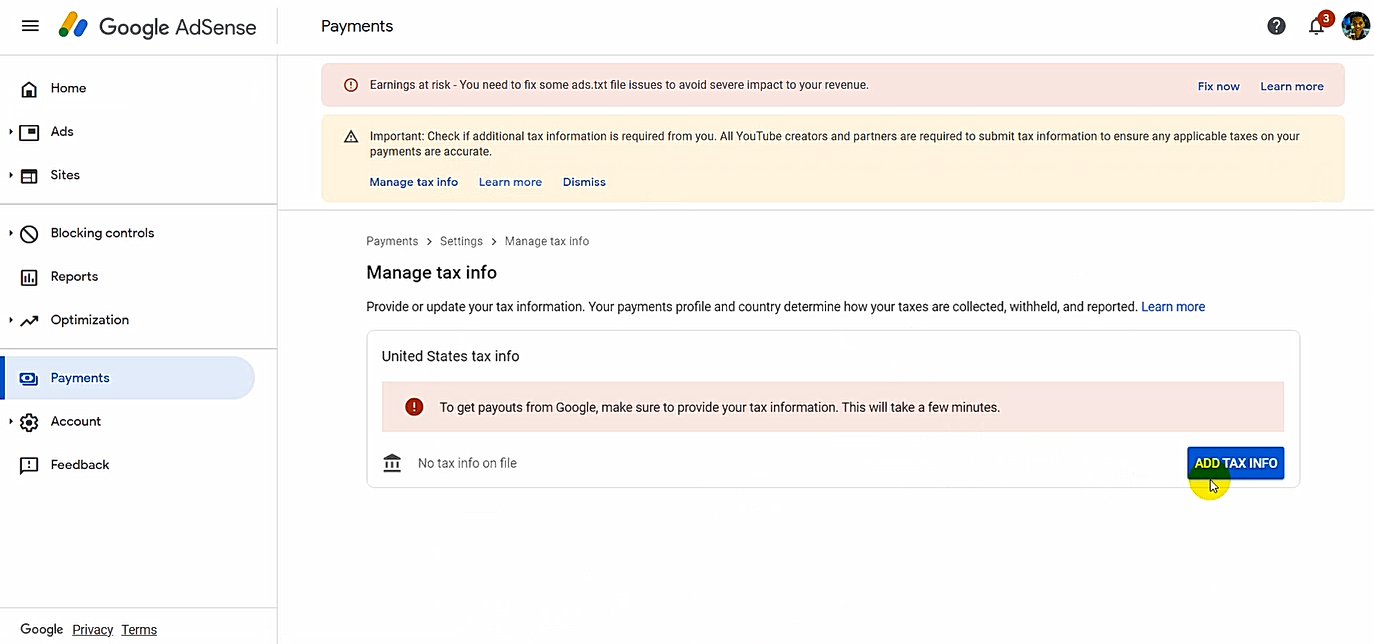
2. In the next screen, click the blue "Add Tax Info" button.
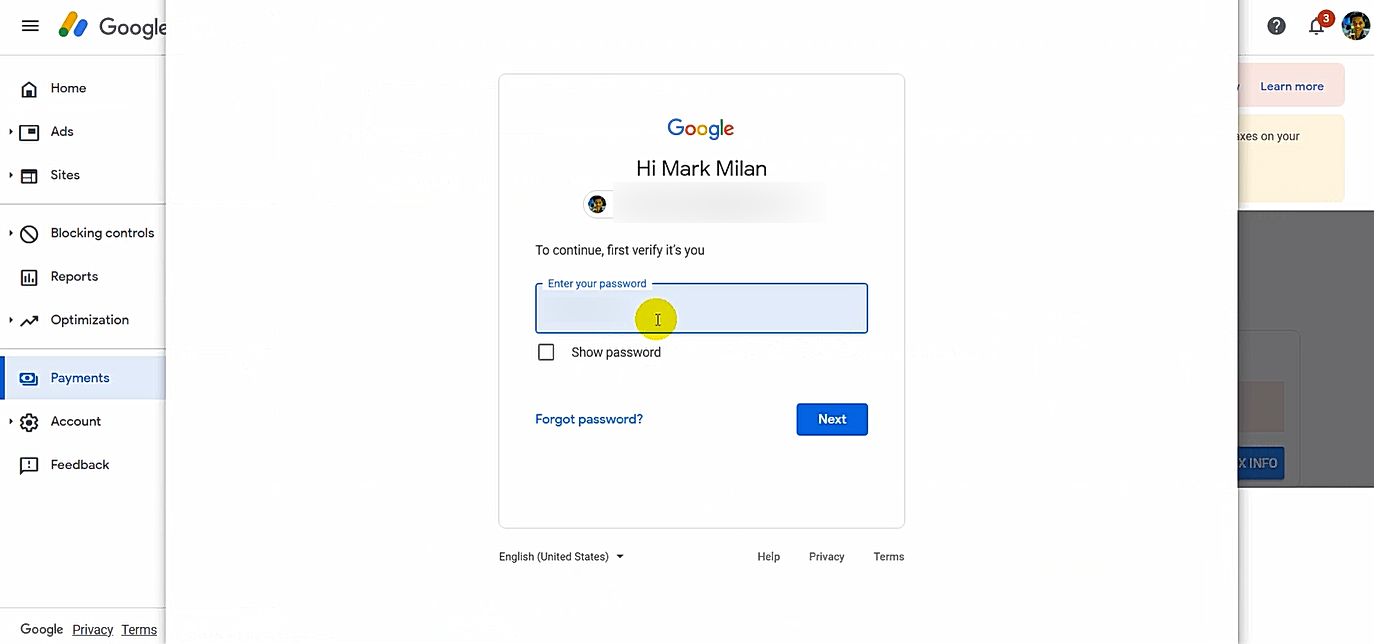
3. You would then have to type in your username and password again for
verification.
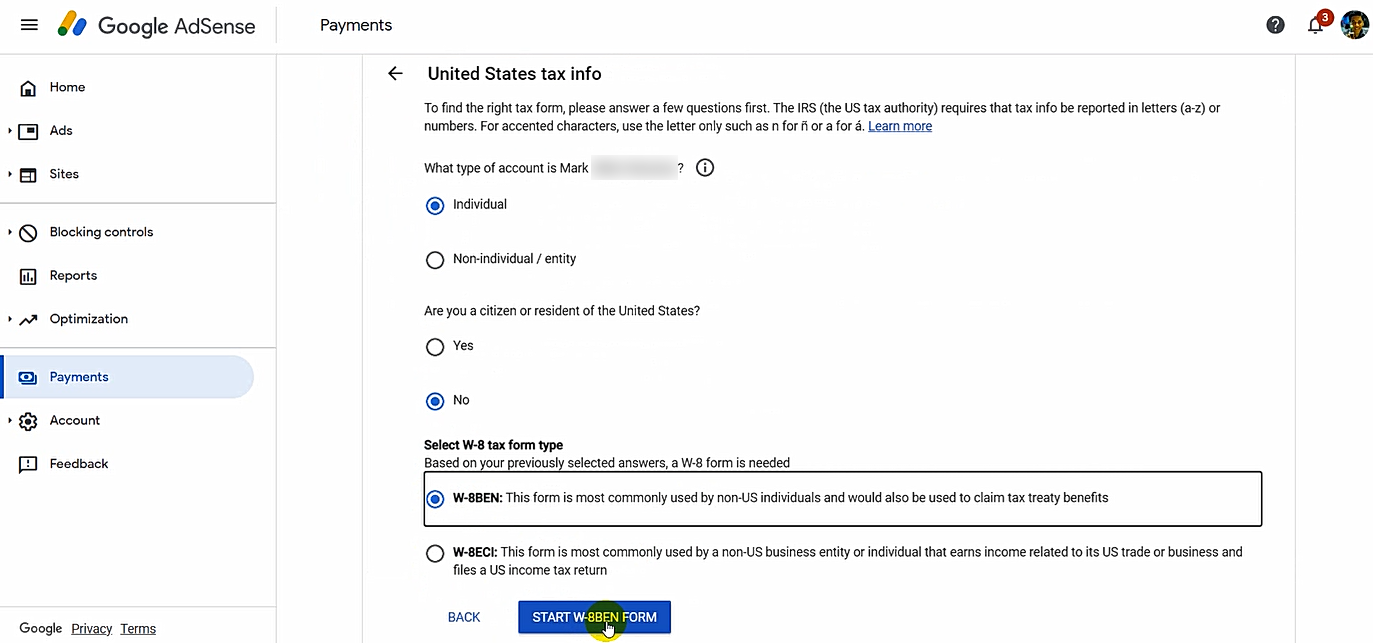
4. As a solo Filipino blogger who is not affiliated with a company, I chose
"Individual", "No", and "W-8BEN" in the type of account, US citizenship, and
W-8 tax form type options. Your case may be different so make the proper
choice.
5. Next, I just typed in my name and skipped the option of adding a business
name.
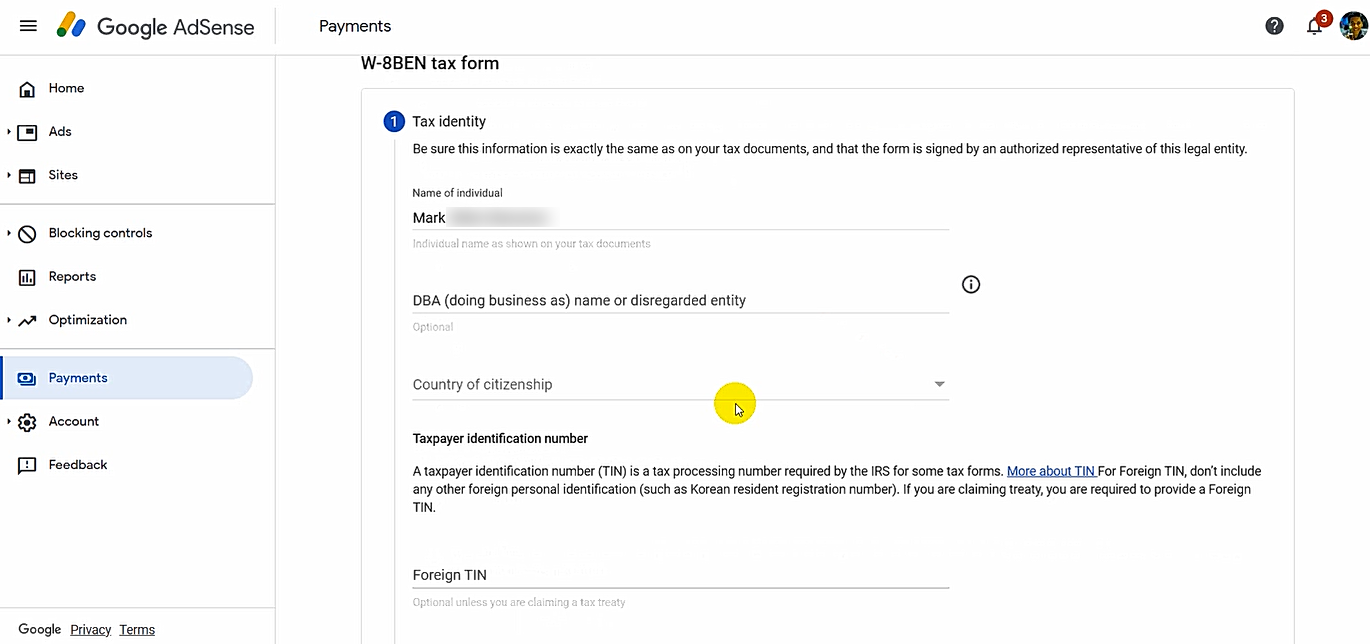
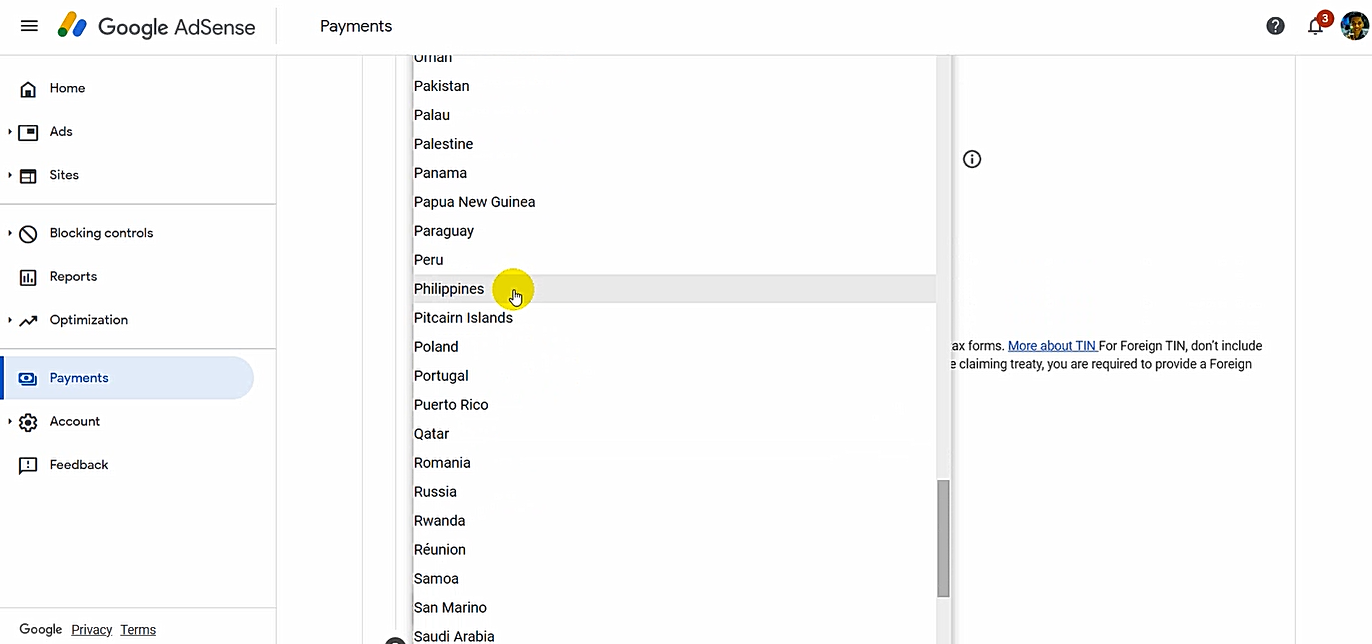
6. I then chose the Philippines as my country of citizenship.
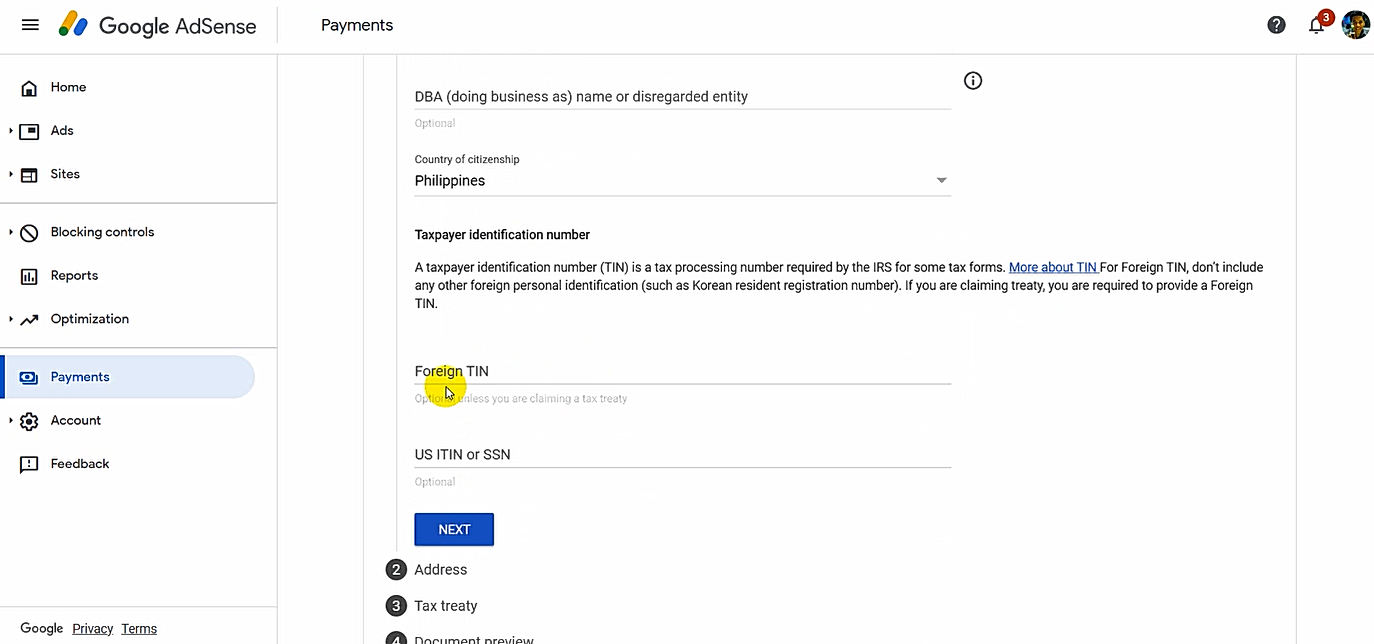
7. I don't have a Foreign TIN (Tax Identification Number) so I just left
those spaces blank. You would need a Foreign TIN if you're applying for Tax
Treaty discount.
8. Moving forward, you just need to type in your current permanent resident
address.
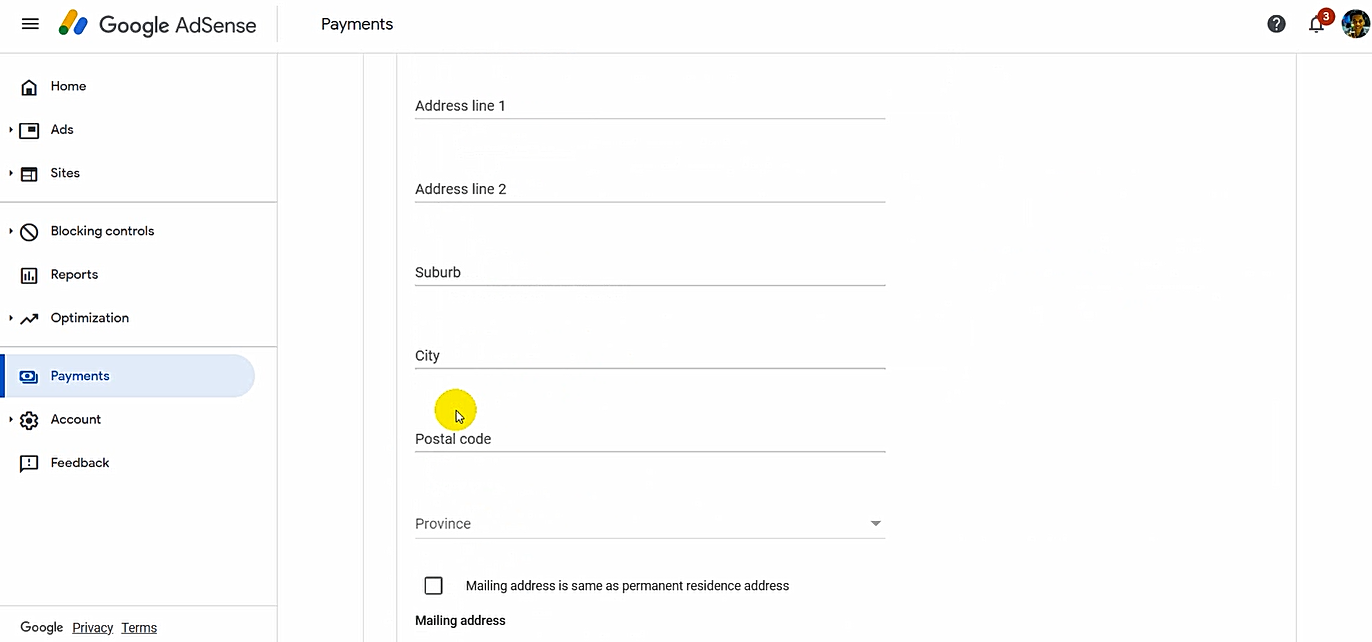
I ran an issue with the "postal code". Google Adsense just won't accept my
correct zip code here in Metro Manila so I just left it blank.
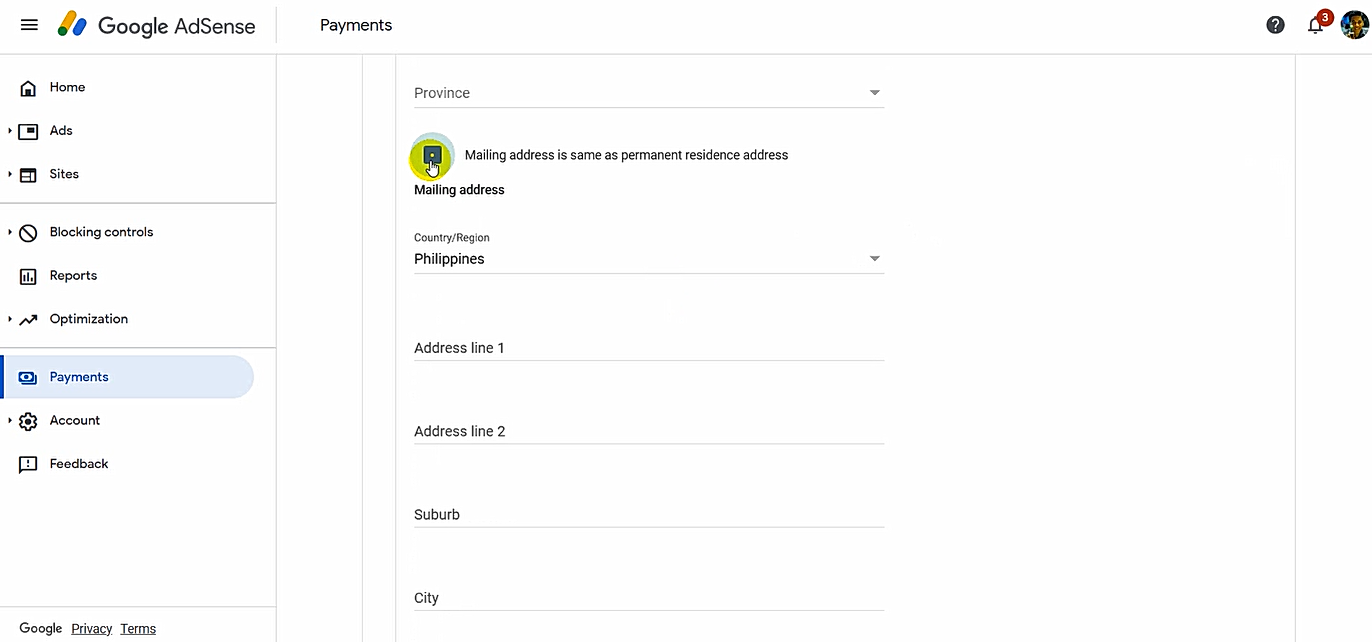
9. Tick the box for "Mailing address is same as permanent address" if you
receive your mails at the residence address you provided.
10. This is perhaps the most important part of this process: The US Tax Treaty
section.
The Philippines actually has a Tax Treaty Agreement with the United States to prevent double-taxation.
However, to enjoy it, I believe you would need a Foreign Tax Identification
Number, which is - as I've said - something I don't have.
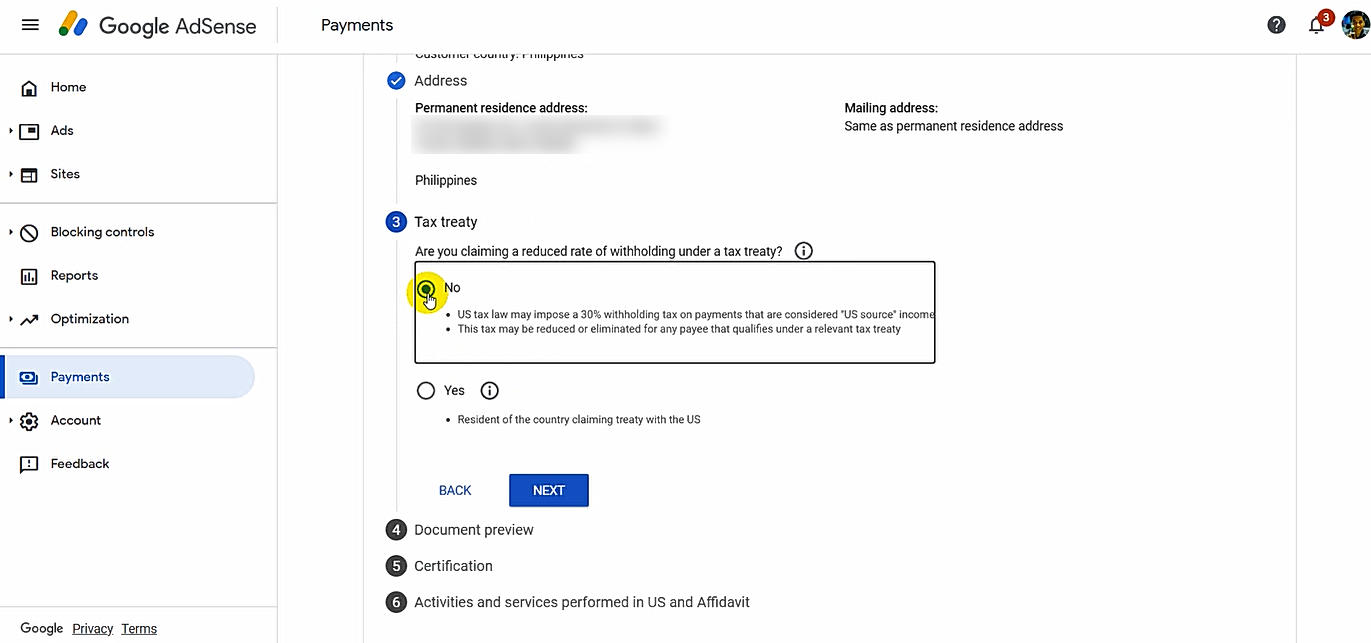
Hence, I simply picked "No", which means that the United Stated may impose
a 30% WHT on payments considered as "US Sourced" income. Nonetheless, this
may be reduced or even eliminated for any payee that qualifies under a
relevant tax treaty. I thought it sounded fair so I went with it.
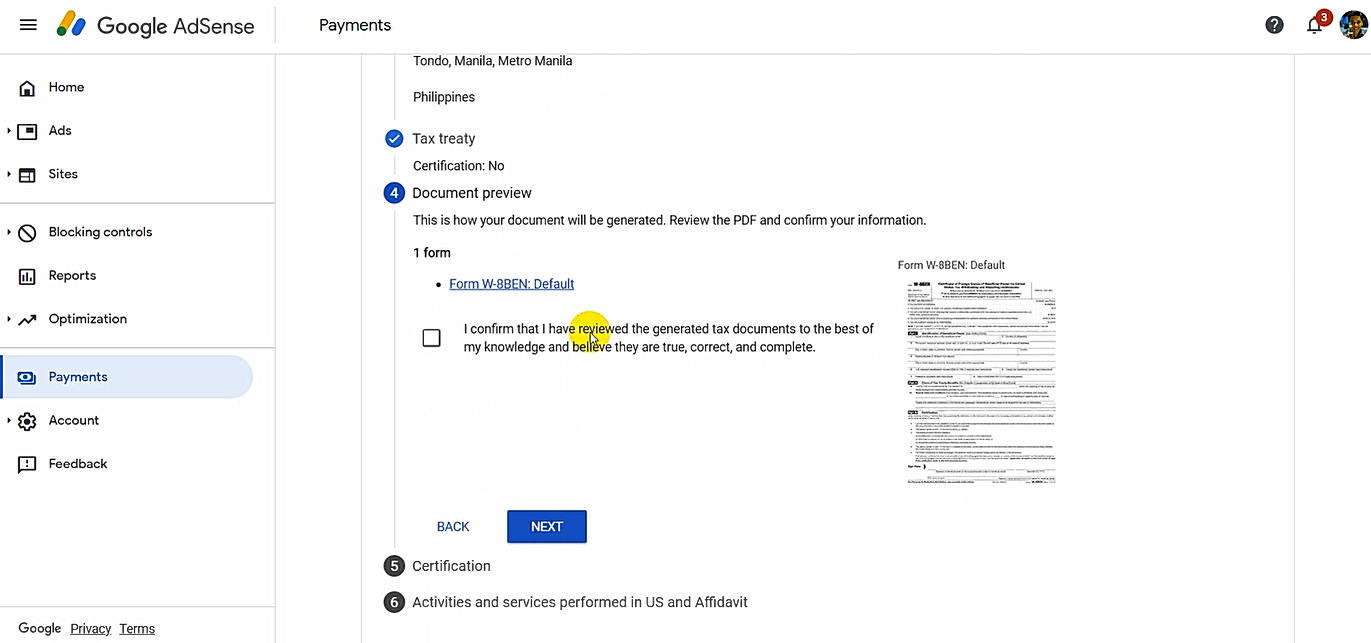
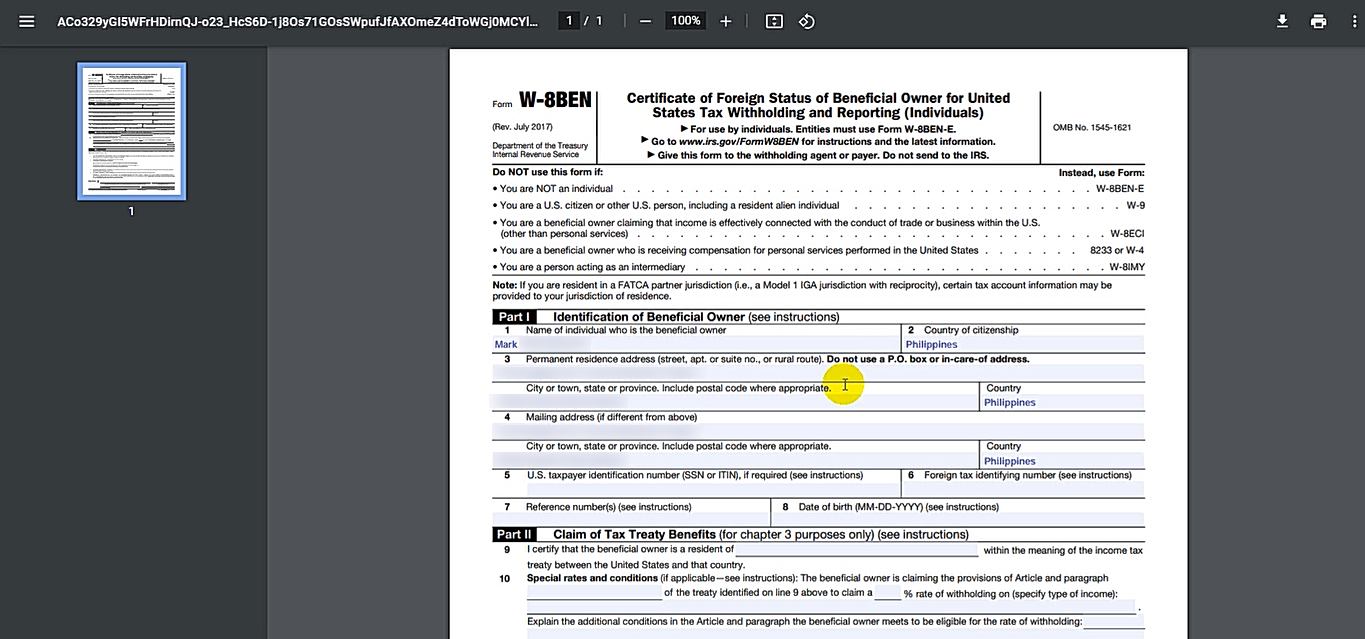
11. After that I previewed my filled-up W-8BEN document and checked if all the
details are correct.
12. When I saw that all details are accurate, I ticked the confirmation
box.
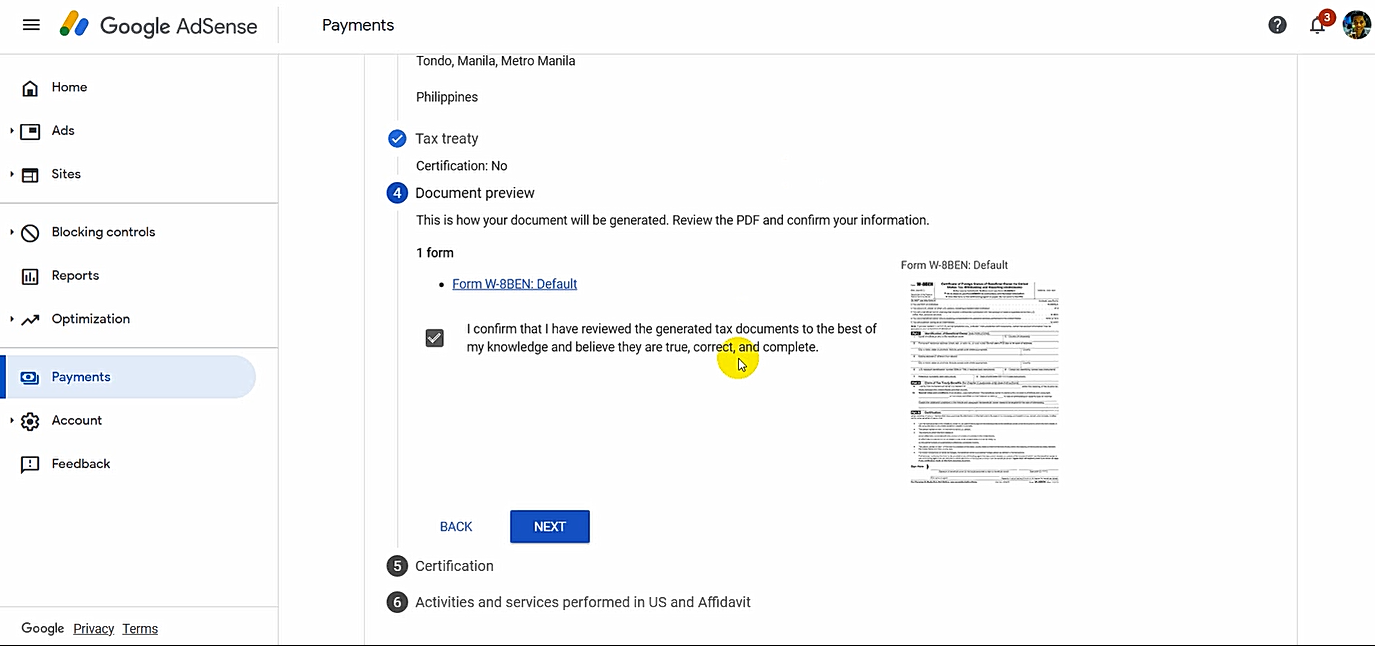
13. Clicking on the "Next" button, I was taken to the Digital Signature
section.
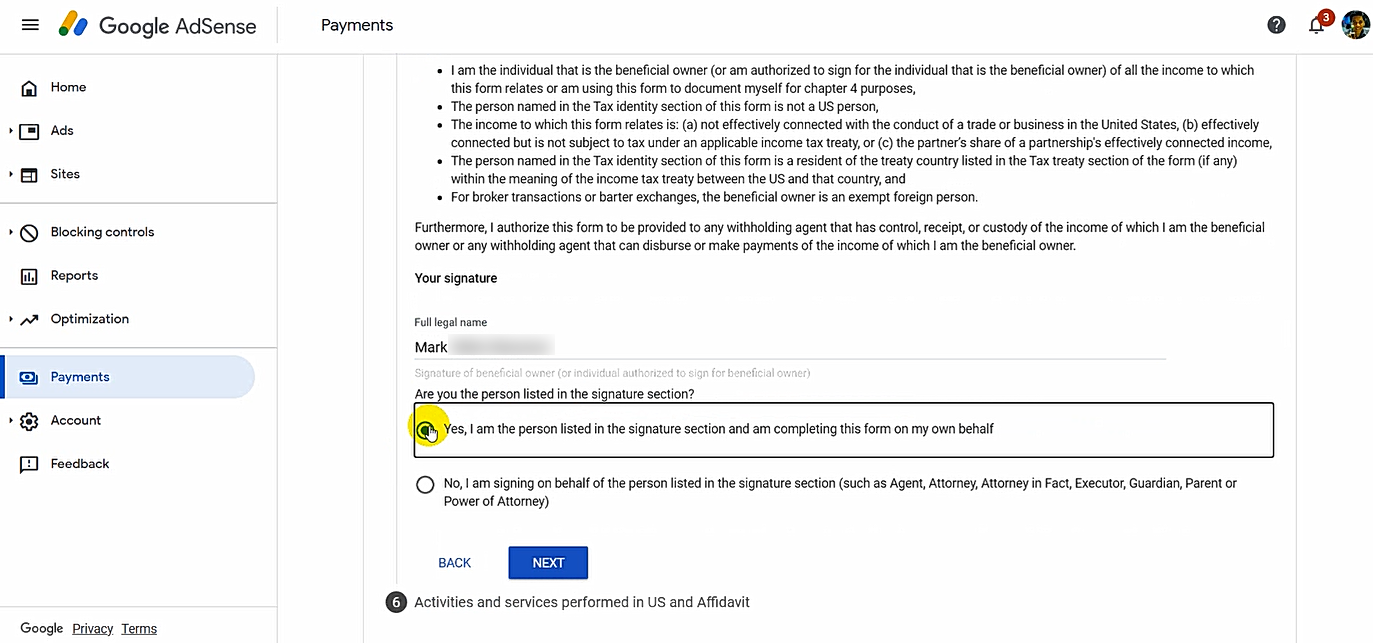
14. I just typed in my name and chose "Yes, I am the person listed in the
signature section and am completing this form on my own behalf." Obviously, if
you have your lawyer or representative fill-up the form for you, they would
have to type in their own names.
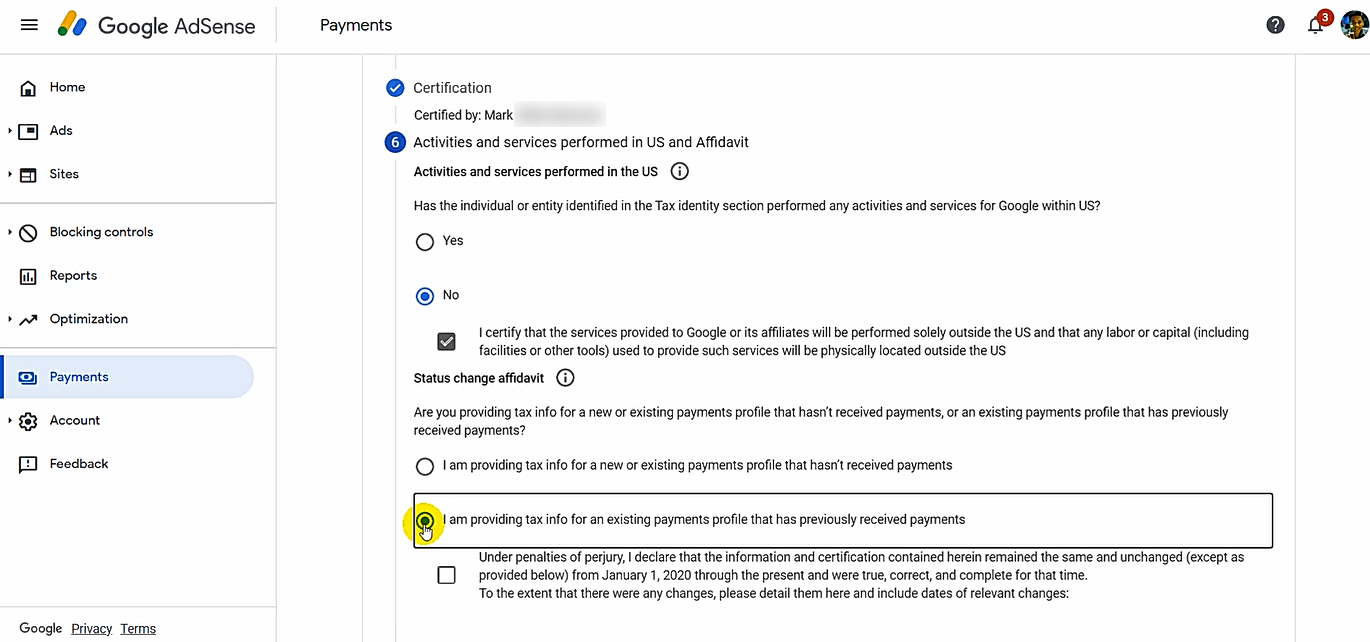
As shown in the image above, I also picked "No" as my answer when asked if I have performed any activities and services for Google within the United States.
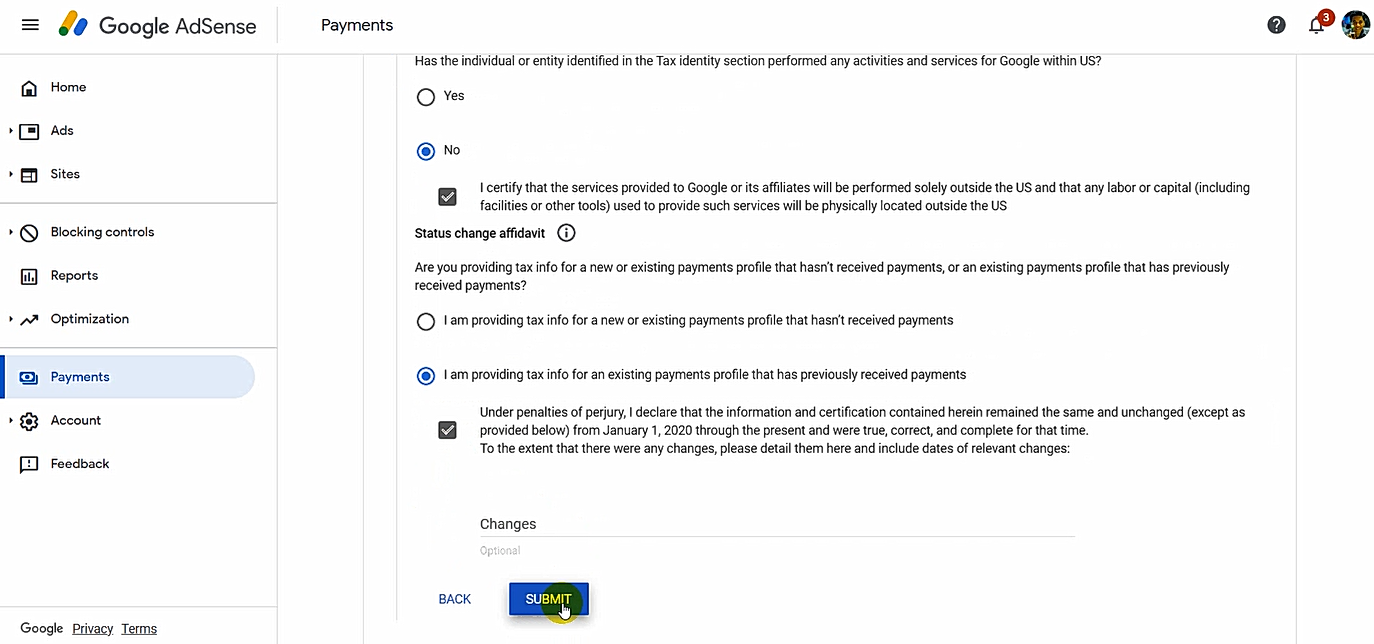
15. Finally, I just clicked submit to wrap up the process! Voila!
After a few minutes, I again clicked on the "Manage tax info" link on the
notification on top of the home screen and I saw that my Form W-8BEN has been
approved by Google Adsense.
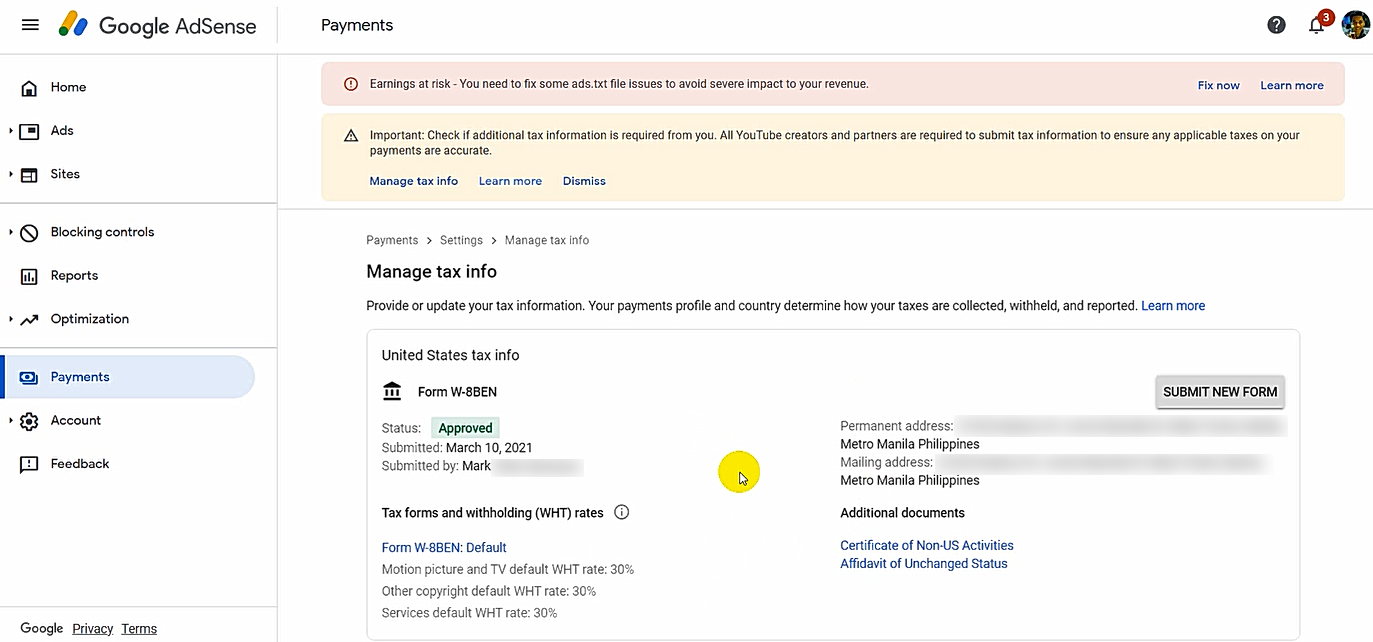
Again, I just shared how I - personally - filled up the form as requested
by some of my peers. Each of us may have a different case so I don't suggest
that you copy all the choices I made above. Nevertheless, if you think we
share a similar profile, then - by all means, study how I did it. Cheers!


